Building a Simple PWA
In this section, we will put together everything we have learned so far to build a simple Progressive Web Application (PWA). This hands-on example will guide you through setting up a basic PWA, including responsive design, registering a service worker, creating a web app manifest, and adding basic caching functionality.
1. Project Setup
Let’s start by setting up a basic HTML, CSS, and JavaScript structure for our PWA. We’ll create a simple web page that can be enhanced into a PWA.
Project Structure:
	my-simple-pwa/
	│
	├── index.html
	├── styles.css
	├── app.js
	├── service-worker.js
	├── icon-192x192.png
	├── icon-512x512.png
	└── manifest.json
These are the two image icons you can use for the files icon-192.png and icon-512x512.png:
icon-192x192.png
![]()
icon-512x512.png
![]()
2. Implementing Responsive Design
First, we’ll create a basic HTML page with responsive design in mind. The following HTML and CSS will create a simple layout that adapts to different screen sizes.
Example: index.html
	<!DOCTYPE html>
	<html lang="en">
	  <head>
	    <meta charset="UTF-8" />
	    <meta name="viewport" content="width=device-width, initial-scale=1.0" />
	    <title>My Simple PWA</title>
	    <link rel="stylesheet" href="styles.css" />
	    <link rel="manifest" href="/manifest.json" />
	  </head>
	  <body>
	    <header>
	      <h1>Welcome to My Simple PWA</h1>
	    </header>
	    <main>
	      <p>This is a simple Progressive Web Application.</p>
	    </main>
	    <footer>
	      <p>© 2024 My Simple PWA</p>
	    </footer>
	    <script src="app.js"></script>
	  </body>
	</html>
Example: styles.css
	body {
	  font-family: Arial, sans-serif;
	  margin: 0;
	  padding: 0;
	  display: flex;
	  flex-direction: column;
	  align-items: center;
	  justify-content: center;
	  min-height: 100vh;
	  background-color: #f4f4f4;
	}

	header,
	footer {
	  width: 100%;
	  padding: 20px;
	  background-color: #333;
	  color: #fff;
	  text-align: center;
	}

	main {
	  padding: 20px;
	  text-align: center;
	}

	@media (max-width: 600px) {
	  header,
	  footer {
	    padding: 10px;
	  }
	  main {
	    padding: 10px;
	  }
	}
This code provides a simple layout that is responsive to screen size changes, ensuring that the PWA looks good on both mobile and desktop devices.
3. Registering a Service Worker
Next, we’ll register a service worker to enable offline functionality. The service worker will cache the necessary files so that the app can load even when the user is offline.
Example: app.js
	if ('serviceWorker' in navigator) {
	  // Register the service worker
	  navigator.serviceWorker
	    .register('/service-worker.js')
	    .then((registration) => {
	      console.log('Service Worker registered with scope:', registration.scope);
	    })
	    .catch((error) => {
	      console.error('Service Worker registration failed:', error);
	    });
	}
This script checks if the browser supports service workers and registers the service worker file service-worker.js.
Example: service-worker.js
	// Define the cache name and the files to cache
	const CACHE_NAME = 'my-simple-pwa-cache-v1';
	const urlsToCache = ['/', '/index.html', '/styles.css', '/app.js', '/manifest.json'];

	// Install event - caching the files
	self.addEventListener('install', (event) => {
	  event.waitUntil(
	    caches.open(CACHE_NAME).then((cache) => {
	      console.log('Opened cache');
	      return cache.addAll(urlsToCache);
	    })
	  );
	});

	// Fetch event - serving cached content when offline
	self.addEventListener('fetch', (event) => {
	  event.respondWith(
	    caches.match(event.request).then((response) => {
	      return response || fetch(event.request);
	    })
	  );
	});

	// Activate event - removing old caches
	self.addEventListener('activate', (event) => {
	  const cacheWhitelist = [CACHE_NAME];
	  event.waitUntil(
	    caches.keys().then((cacheNames) => {
	      return Promise.all(
	        cacheNames.map((cacheName) => {
	          if (cacheWhitelist.indexOf(cacheName) === -1) {
	            return caches.delete(cacheName);
	          }
	        })
	      );
	    })
	  );
	});
This service worker script does the following:
- Caches the specified files during the
installevent. - Serves cached content during the
fetchevent, providing offline capability. - Removes old caches during the
activateevent.
4. Creating a Web App Manifest
Now, we’ll create the manifest.json file that defines the appearance and behavior of our PWA when it’s installed on a user’s device.
Example: manifest.json
	{
	  "name": "My Simple PWA",
	  "short_name": "SimplePWA",
	  "description": "A simple Progressive Web Application example",
	  "start_url": "/index.html",
	  "display": "standalone",
	  "background_color": "#f4f4f4",
	  "theme_color": "#333333",
	  "icons": [
	    {
	      "src": "/icon-192x192.png",
	      "type": "image/png",
	      "sizes": "192x192"
	    },
	    {
	      "src": "/icon-512x512.png",
	      "type": "image/png",
	      "sizes": "512x512"
	    }
	  ]
	}
This manifest file includes the app’s name, start URL, display mode, colors, and icons. It ensures that when the user adds the PWA to their home screen, it will have the specified appearance.
5. Adding Basic Caching
The service worker script we created earlier already handles basic caching by storing the specified files during the installation phase. This caching ensures that the application can load these files even when the user is offline.
6. Testing the PWA
To test your PWA, open the application in a browser that supports PWAs (like Chrome or Firefox). Here’s how you can test your PWA:
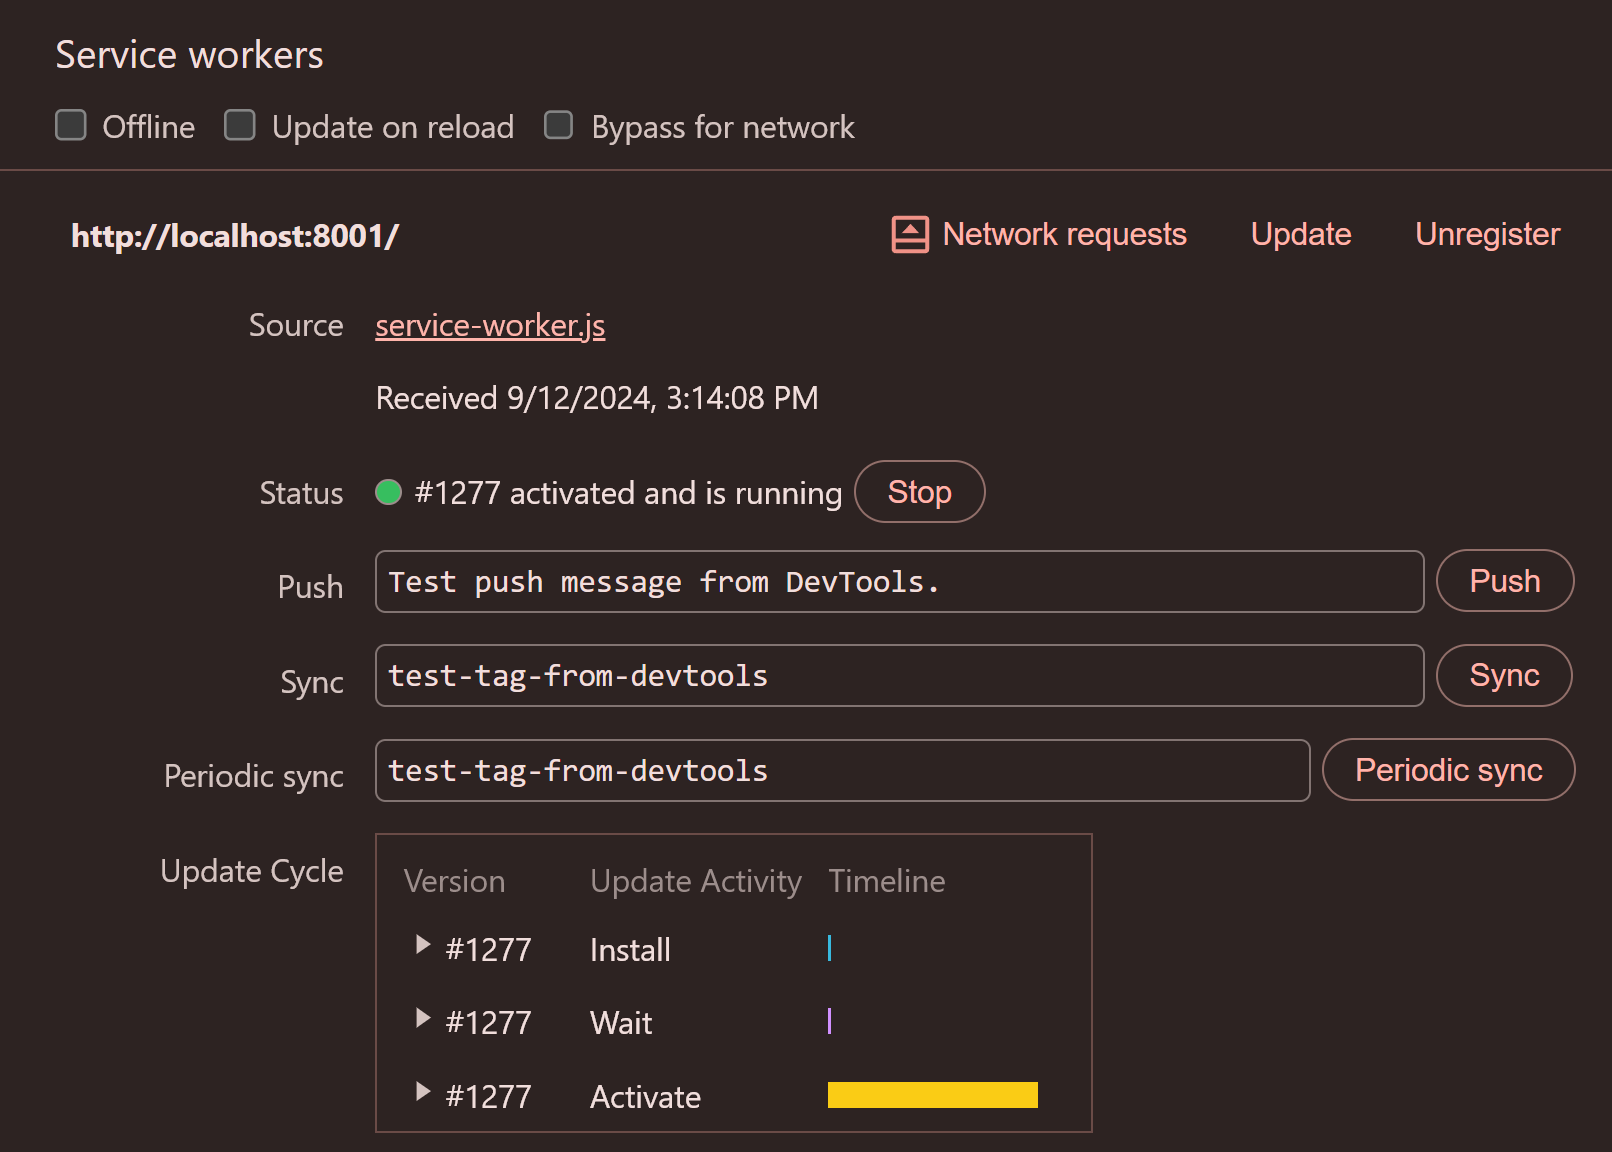
- Check the Service Worker: Open the browser’s developer tools (right-click -> Inspect -> Application or Service Worker tab) to see if the service worker is registered and active.
- Simulate Offline Mode: In the Network tab of the developer tools, set the network to “Offline” and refresh the page. The app should still load from the cache.
- Install the PWA: In the browser’s address bar, you may see an “Install” button or a ”+” icon. Click it to add the PWA to your device’s home screen. The app should open in standalone mode, without browser UI elements.
Congratulations! You’ve successfully built and tested a simple Progressive Web Application. This PWA includes responsive design, offline support through a service worker, and a Web App Manifest for installation.